Information about the Autopay user portal
The Autopay Portal is the transaction portal for the Autopay payment gateway, where you can find all the information about transactions processed in your shop, as well as a range of other important data.
If you would like to learn how to use the Autopay portal, please follow the instructions below. If you have any questions that are not answered here – have a look at our knowledge base , where we explain the key points.
Log in
To log in to the Autopay portal:
-
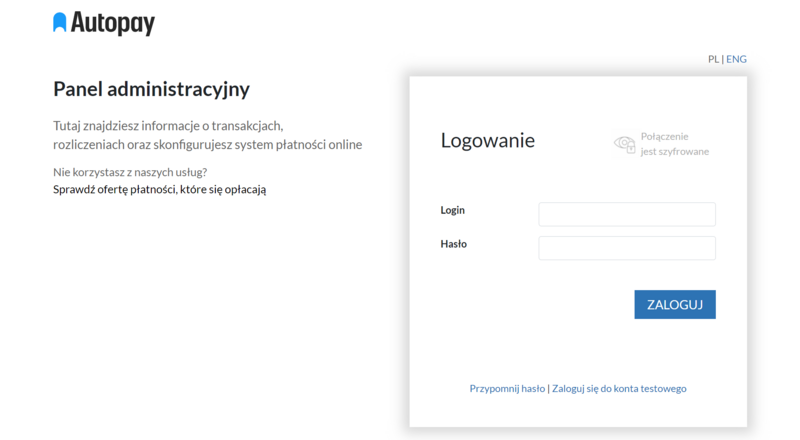
Go to portal.autopay.eu/admin
-
Enter your username and password, then click Log in.

A suggestion!
If you cannot remember the correct password, click Reset password and enter your username. This will trigger an email to be sent to your inbox containing a link to change your password. If you can’t find it, check SPAM and the other folders.
Important: Please also make sure you log in using the correct address:
- test mode – https://testportal.autopay.eu/admin
- production mode – https://portal.autopay.eu/admin
Transactions
This tab contains all the details of transactions processed via the payment gateway within the selected time period.
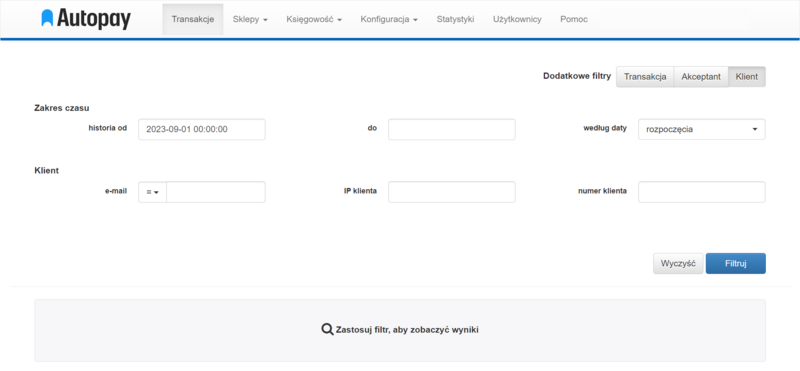
To go to the list of transactions, select the tab from the top menu Transactions. There, you can filter the information displayed by selecting the date range or currency you’re interested in. You can enter a specific date range or select an additional filter to view transactions by their start date or payment date. It’s worth making use of these features, as they make searching easier – particularly if your shop processes a large number of payments.
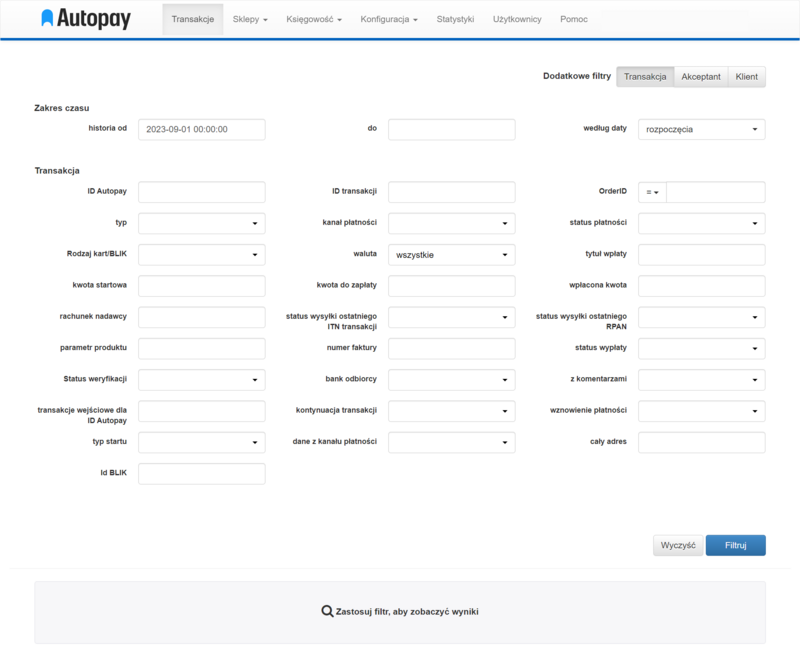
You can easily search through the transaction list using the filters below:
- Autopay ID – A 10-character identifier generated by the Autopay System – shown on the customer’s transfer confirmation. Example: APRN82S9XX;
- Order ID – the order number on the Partner’s website. When you click the button next to the ‘OrderID’ field, several additional search options using this information will appear.
- Payment channel – any payment method, e.g. BLIK
- Payment status – once you have selected a payment status (e.g. Positive), we will show you all payments from the selected time period that have been successfully paid;
- Sender’s invoice – you can find transactions by entering the payer’s bank account number. Important: if you use this filter, you will not be able to find unpaid transactions;
A suggestion!
If you do not select any filters, the portal will display all the transactions generated.
Additional search filters
If you have access to more than one service through which you receive online payments, the Autopay portal allows you to search for transactions relating to a specific service. This makes it easier for you to find the information you need.
To filter transactions by service:
- go to the tab Transactions visible in the top menu
- enter a date range in the calendar
- select an additional filter Merchant (you’ll find it on the right-hand side)
- Fill in the parameter (Service/Billing point/Online shop URL) and click Filter
Here is a legend explaining the different transaction statuses.
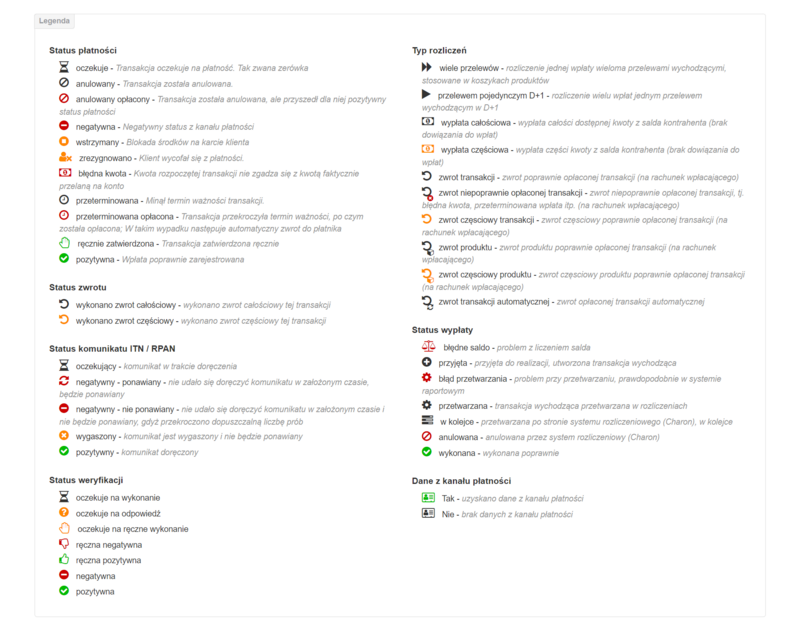
Descriptions of transaction types
- IN – incoming transaction (generated by the customer)
- IN_TO_REFUND – a transaction (e.g. setting up a direct debit) which is automatically refunded to the payer
- IN_BALANCE – topping up a prepaid balance
- OUT – payment of funds – transfer to the Partner’s bank account (D+1 – the next working day)
- OUT_REFUND – automatic refund of a transaction paid incorrectly, e.g. an incorrect amount or a transaction paid after its expiry date
- OUT_MASS_TRANSFER – processing a single payment via multiple bank transfers to recipients
- OUT_BALANCE_PARTLY – partial withdrawal of funds from the Partner’s balance
- OUT_BALANCE_WHOLE – a full withdrawal of funds from the Partner’s balance
- OUT_EXTERNAL_REFUND_TRANSACTION – a full refund of the transaction amount to the payer
- OUT_EXTERNAL_REFUND_TRANSACTION_PARTLY – a partial refund of the transaction amount to the payer
- OUT_EXTERNAL_REFUND_PRODUCT – full product refund – a solution provided at the Partner’s request
- OUT_EXTERNAL_REFUND_PRODUCT_PARTLY – partial return of the product – an option available at the Partner’s request
- OUT_RECURRING_REFUND – automatic refund of the direct debit activation transaction to the payer
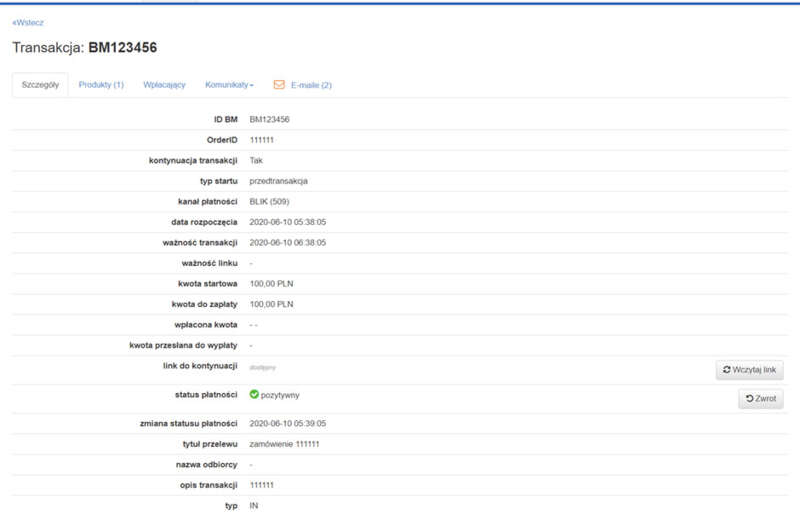
Transaction details
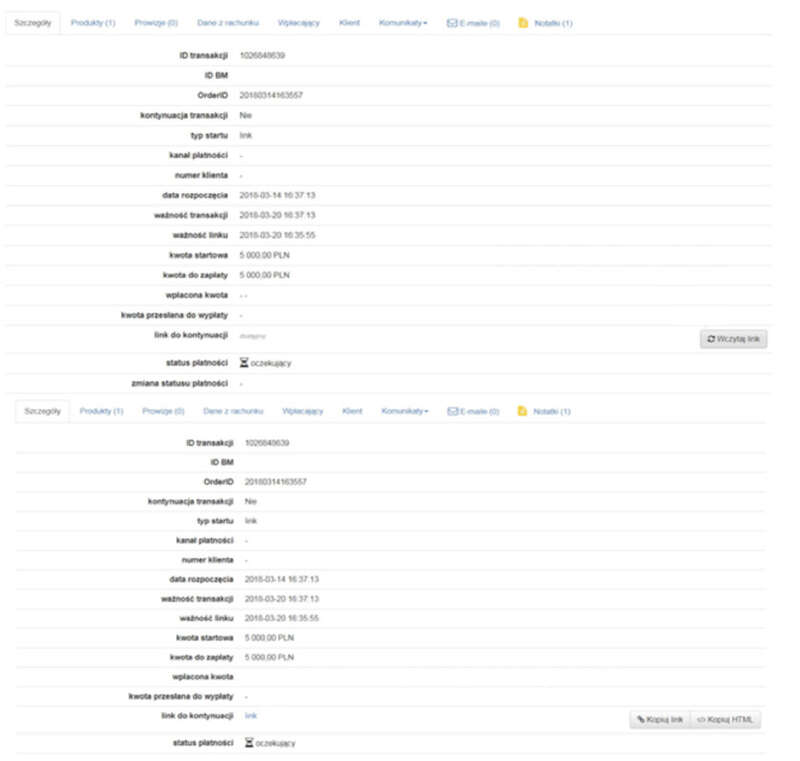
From this screen, you can request a refund for a paid transaction, copy the link to continue the transaction and send it to the customer, and check the payer’s details.
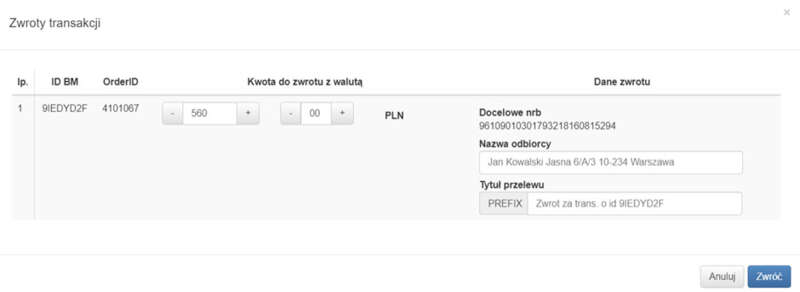
The return details are filled in automatically – All you need to do is confirm the transaction, and the refund will be processed.
The transaction details also include the following information:
- Payer – details of the person carrying out the transaction (for transactions paid for using BLIK, a payment card or a digital wallet, this tab will be empty – we do not receive the payer’s details);
- Products – the specified settlement transfer and the products included in the transaction (provided that the ‘products’ parameter was sent at the start of the transaction);
- Announcements – notification that a message has been delivered (ITN/RPAN) for payment, with the option to renew it – this is used to change the order status;
- Email – information about emails sent to the buyer.
How do I request a transaction refund?
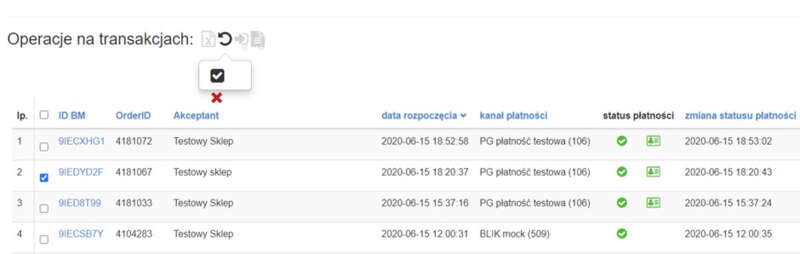
To request a refund for one or more transactions:
- select a tab Transactions visible in the top menu
- search for a transaction that interests you using the filter
- Activate the phrases by clicking the arrow shown in the section Transaction operations
- tick the checkbox next to one or more transactions to be refunded
- Click the ✅ icon to go to the returns form
- Enter the refund details (transaction amount, account number, reference for the refund) or leave the payer’s details for the order, which will be filled in automatically
- click Return, to confirm the operation
The option described above is not available to all users of the Autopay portal. If you cannot see it on your account, you will need to initiate the refund to the customer yourself.
A suggestion!
In the case of card payments, if the refund details (NRB, recipient’s name) are not entered manually, the refund amount will be credited to the card used to make the payment.
Export the transaction list to a file
When using the portal, you can export a list of transactions to an .xlsx or .csv file on demand.
To do this:
- select a tab Transactions from the top menu
- Expand the list of filters and select: additional filters ‘Transaction’
- Fill in the filters with the parameters on which the list is to be based (the most common are: date range and payment status)
- click Filter, and the portal will display a list of transactions
- Click on the green export icon shown in the section Transaction operations
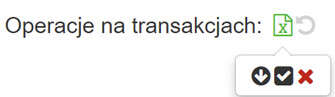
- Select the transactions you wish to download to a file, or download them all by clicking the down arrow
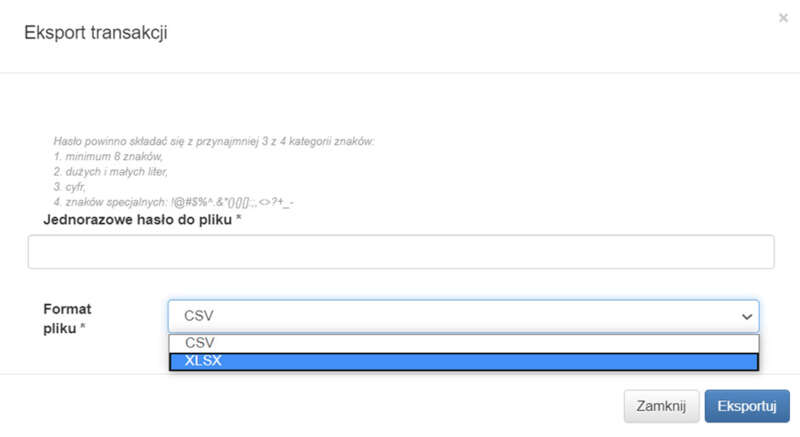
- Enter the one-off access password for the file, select the .csv or .xlsx format, and click Export
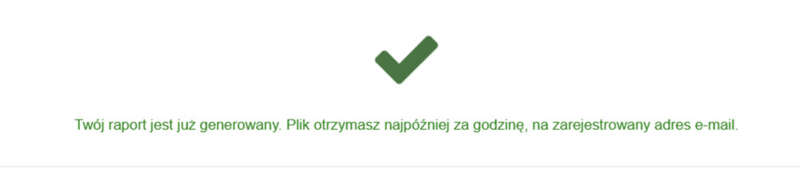
Once the transaction export request has been successfully approved, a message will appear stating that the report is being generated.
Accounting
In the Accounting tab, you will find: Reports and Invoices.
Transaction reports We send these to your email inbox – once a day (with a summary of the previous day’s transactions) and once a month (with a summary of all transactions for that month). They are also always available once you have logged in to the Autopay portal.
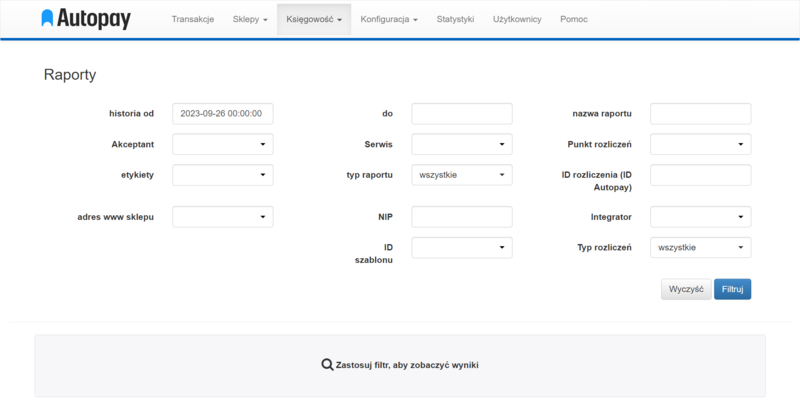
The transaction report is in the form of a .CSV file, which contains data such as:
- the date range, i.e. the period for which the report was produced
- report version number
- shop ID
- shop name
- the transfer ID associated with the report
- the amount of transfers linked to the report
- the date of the transfer order associated with the report
- payment date
- transaction type
- transaction amount
- commission amount
- the name of the payment channel through which the customer made the payment, along with a range of other details, giving you a full overview of all transactions carried out during a given period.
Invoices They include a summary of all transactions and the fees charged for transactions processed via the payment gateway. At the end of the month, we send a summary invoice to the email address you have provided. However, you can view your invoices at any time by logging into the Autopay portal and downloading them yourself.
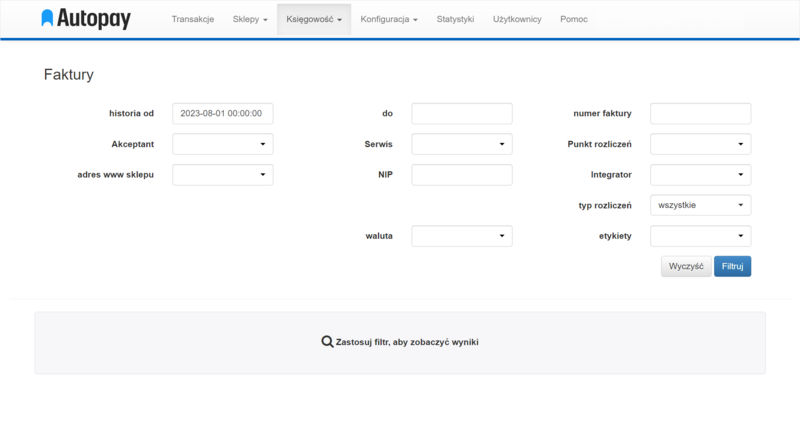
To make it easier to find the right documents, you can use the following filters:
- merchant
- service
- report type (relates to the reports tab)
- currency (applies to the invoices tab)
Statistics
When using the tab Statistics You can easily analyse the key data on an annual, monthly or daily basis, or by setting your own date range (maximum range is 65 days). You can check, for example, the number of payments processed, the average amount paid, or the amount due minus the Autopay commission.
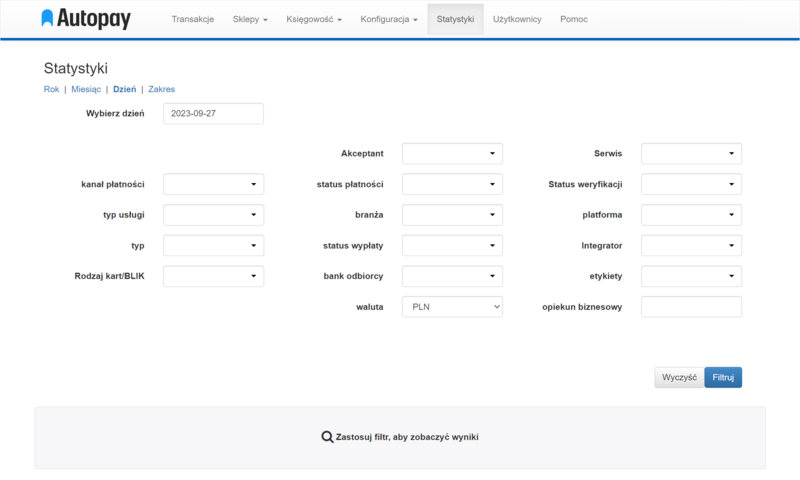
In this tab, you can also use handy filters such as:
- Merchant
- Service
- Payment channels – you can find out which payment methods customers prefer
- Payment status – you can easily check how many successfully processed payments have been made this month (uncompleted transactions change their status after 6 days from pending on past its use-by date)
- Verification status – this is a filter that Partners carrying out verification transfers through us can use
- Type – you can view statistics for specific transaction types, such as: refunds, receipt of funds from a payer, settlement transfers, etc.
Users
This tab allows you to manage access to the portal – you can add any number of users who will oversee transactions carried out in your online shop, or edit existing access rights.
You can easily check how many active accounts have access to the Autopay portal and what their permissions are.
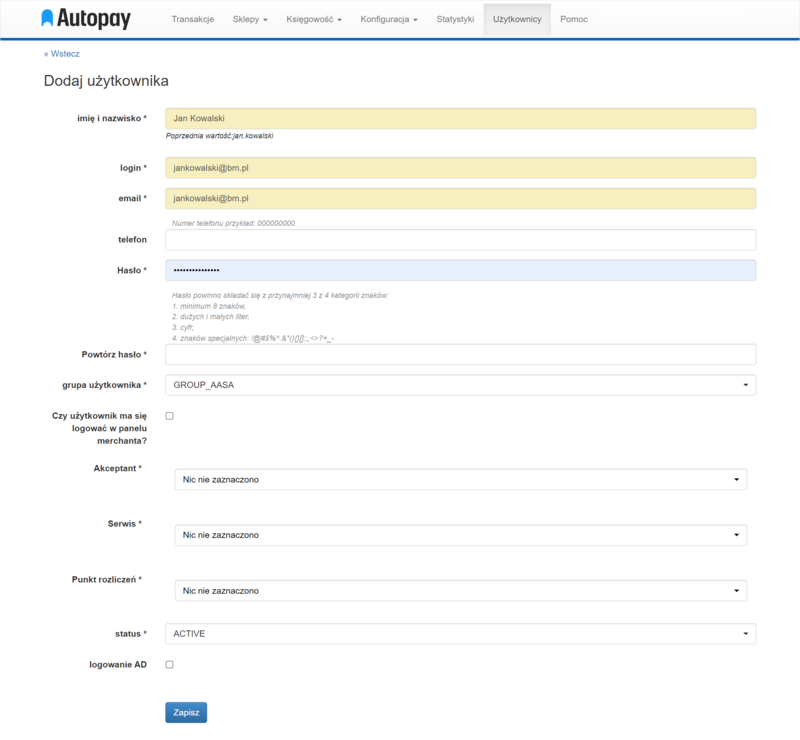
Any user with permissions Admina can add new users themselves. To do this:
- select a tab Users visible in the top menu
- click Add visible in the bottom left-hand corner
- Please enter the details that the new user will use to log in to the Autopay portal (required fields are marked with an asterisk)
- click Save, to approve the creation of a new user
Definitions of user groups
- GROUP_ECOMMERCE_ADMIN – the ability to add new users, view company details and services, edit technical notification (ITN) addresses and billing addresses; access to transaction statements and the ability to view and download lists of invoices and reports;
- GROUP_ECOMMERCE – access to company data and services, including reports, invoices, transactions and account balances;
- GROUP_ECOMMERCE_ADMIN_BALANCE – access to an overview of company data, transactions, invoices and reports, and the ability to add new ones users. Inability to process refunds for customers;
- GROUP_ECOMMERCE_INVOICE – access to transaction statements, the ability to view and download lists of invoices and reports;
- GROUP_ECOMMERCE_IT – access to services, including transactions and a view of transaction errors, and the ability to edit addresses for technical notifications and the billing address;
- GROUP_ECOMMERCE_PAYLINK – access to the service dashboard and the ability to generate a payment link. Preview available only for transactions completed using the generated payment link;
- GROUP_ECOMMERCE_PAYLINK_ALL_TRANSACTIONS – access to the service dashboard and the ability to create a payment link. Access to all completed transactions.
Shops
In this tab, you will find an overview of the website’s key configuration details. When you click on Shops You will be redirected to the merchant’s or service provider’s view – depending on the level of access rights granted to you.
Merchant
When using the tab Shops You can check which bank account we use to transfer your payments to, view your billing details, and find your Service ID and hash key.

To view the details, click on your company name in the column Name.
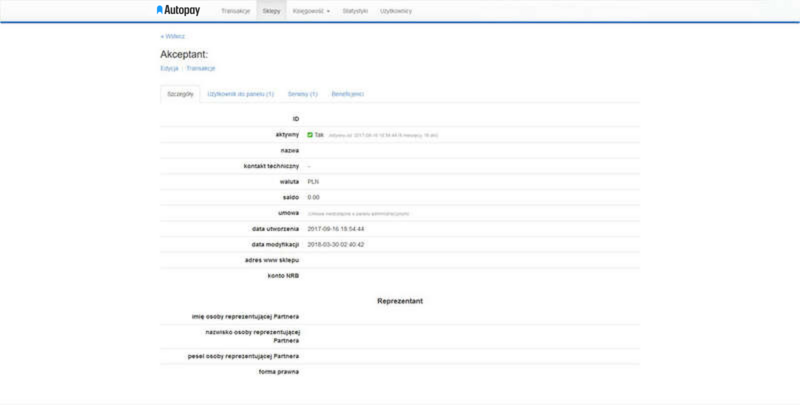
Here, you can check which bank account we transfer funds to, who the company representative is, who has access to the portal, and also see how many services are assigned to your company.
Service
To view the details of the website, click on the tab Shops or in Services visible from the merchant’s perspective. You will then see a list of the configured services.
There is also an option here to activate the balance from which you can arrange refunds for customers (button: Activate your balance).
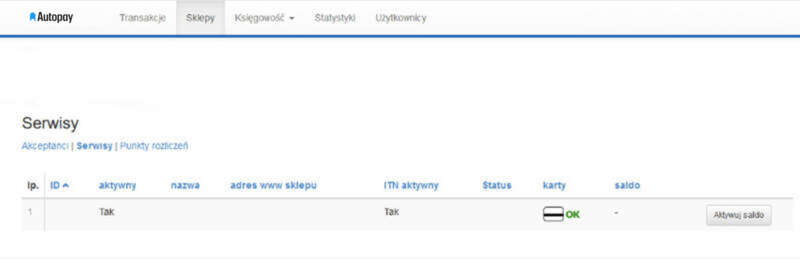
When you click on the name, you will be taken to the website details.
You can copy it from here Website ID (ServiceID) and shared key (hash) – this data is necessary to process your payments.
A suggestion!
When sharing this data, please ensure it remains secure. Make sure it does not fall into the hands of third parties. You can do this by creating temporary access to the Autopay portal. These recommendations relate to security procedures. If you have any reason to suspect that the key (hash) has been compromised, you must Please report such an incident to us.
The ‘Service Details’ tab contains the following options:
- Edition – the option to change ITN addresses and return;
- Transactions – from within the website, you can access the list of generated transactions with a single click;
- Invoice configuration – by going to this tab, you can check whether your address details are correct and add or change the email address to which invoices are sent;
- Payment Link Wizard – Here you can manually generate a payment link and send it to the customer by email or text message (this service is available as an additional option – a shortened payment link).
- Top up your balance – Here you can generate a payment to top up your prepaid balance.
- Transaction errors – a useful tab that provides information about issues with initiating payments – it highlights errors that occur whilst initiating a transaction.
- Campaigns – a service designed for Partners who use the Autopay portal to send bulk SMS messages.
Editing website data
After clicking the button Edition As shown in the website’s details section, you can edit some of the information – the screenshot below shows which details can be edited:
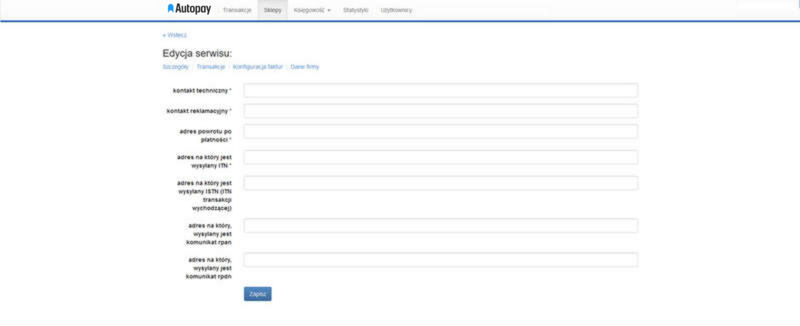
- Technical support – the email address to which we will send notifications regarding undelivered payment notifications;
- Complaints contact details – this address is shown in the confirmation email sent to the customer;
- Return address after payment – this is the address to which we will redirect the user after they log out of online banking;
- ITN address – the address to which we send the payment notification;
- ISTN address – we send a notification of completed settlements to this address – (additional service);
- RPAN/RPDN addresses – the details required to set up automatic payments (recurring payments/one-click payments – an additional service).
Adding a new shop
To add a new shop, please register on the website https://portal.autopay.eu.
If you wish to add another shop to be linked to your existing Autopay account, please contact us using the form available at https://developers.autopay.pl/kontakt. We will ask you for the details needed to set up the service, after which we will add it to your account. Once you have logged in, you will find it under the ‘Shops’ tab.
Generating and sending a payment link to an email address
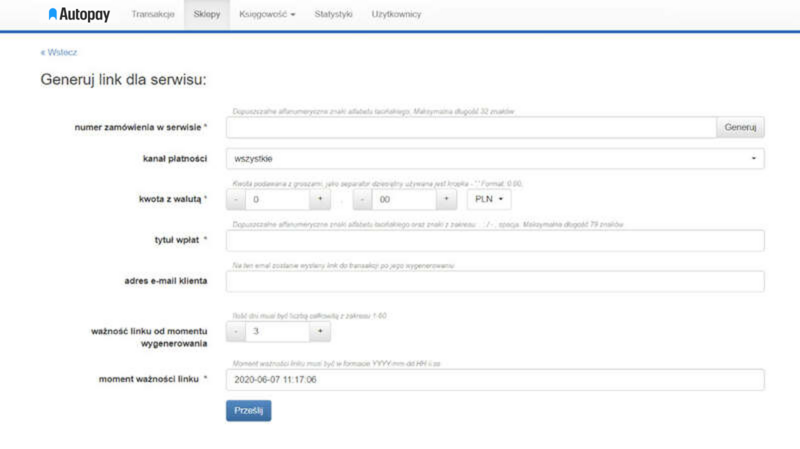
When using the Autopay portal, you can manually generate a payment link and send it to your customer by email.
To generate a payment link:
- Go to the service details
- click on the tab Payment Link Wizard – you will be redirected to the payment link wizard
- Please fill in the required details
Sending a payment link via text message (optional)
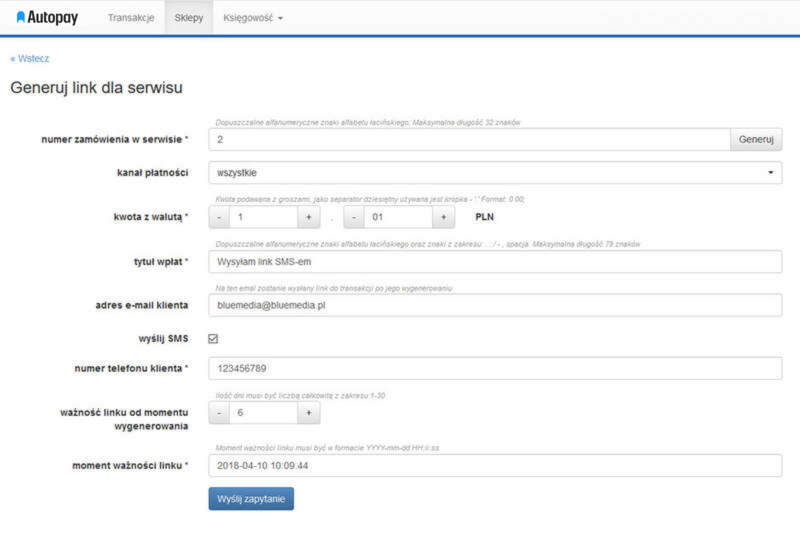
The administration portal also allows you to send a payment link via text message.
To send a text message to a customer containing a payment link:
- Complete the link wizard form
- tick the box Send a text message
- Enter the mobile number you wish to send an SMS to in the appropriate field
- click Upload
Balance
The online balance is the amount of funds held in the Autopay system following the last transaction carried out on a given day.
The so-called ‘main balance’ consists of customer payments that have not yet been settled (i.e. net of commission and refunds issued to customers). This balance cannot be topped up via the Autopay portal, as it is credited automatically – exclusively with funds derived from transactions.
If you wish to change the frequency of withdrawals from your balance, please contact us using the form available at developers.autopay.pl/contact
You can check your balance by going to the “Shops” tab and then selecting “Services”.
Your balance is held in the currency of your choice. If this is a foreign currency, it will be converted before you withdraw funds. To find out about the rules governing currency conversion and withdrawals from your foreign currency balance – Use the special calculator.
Top-up of prepaid balance (optional)
As well as the main balance, you can also set up what is known as a prepaid balance, which you can use, for example, to process returns.
As the amount of funds in the main balance decreases as transactions are settled, it is not always possible to process a refund. A prepaid balance resolves this issue. Funds held in the prepaid balance remain available until they are used to process refunds.
If you would like to set up a prepaid balance, please contact us using the form available at https://developers.autopay.pl/kontakt.
You can top up your prepaid balance via the Autopay portal. Once your balance is active, log in, go to the details for the relevant service, and then click Top up your balance.
If, after selecting the ‘Top up balance’ option, the system does not redirect you to the payment form and a # appears at the end of the address in your browser, this means that the balance is not yet active. In this case, please contact us.

To top up your account balance:
- Please complete the payment form
- Click ‘Submit’.
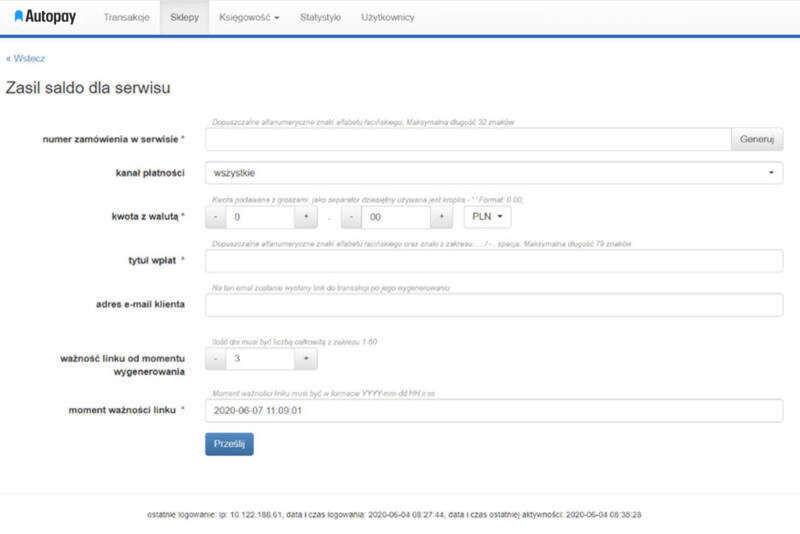
Once the payment link has been generated, you will be automatically redirected to the payment page – at this point, you should enter the link and complete the payment.
A suggestion!
If you have any further questions about your balance or would like to find out more – have a look at our knowledge base, where we discussed the key issues.
 Podziel się opinią